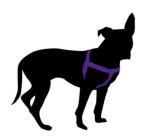
I am a big, big fan of tie-downs. Tie-downs can help you manage your dog’s behavior or introduce another dog safely. They can be life-savers, however it can be difficult to find a dog cable in the right length–actually it is near impossible. There are a lot of projects where you can substitute something for something else (in this case, you might want to sub a leash for a dog cable) but this is NOT one of those projects.
You need a dog cable because it is not able to be chewed through. Dogs on tie downs often (initially) test the tie-down and will chew. If it’s a leash, they could chew through it. If you are using a tie-down as a management tool to keep dogs separate, this could result in a dangerous dog fight. At a minimum it would be ineffective. Some dogs are so polite that they almost never chew, but I still wouldn’t put them on a tie-down on a leash if you are using the tie-down for their safety. It’s an easily avoidable, foreseeable issue, so I recommend avoiding that scenario altogether.
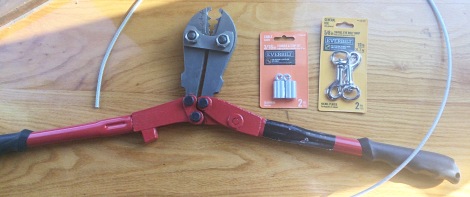
What you will need:
- Swaging Tool– Okay, this is not as cool as it sounds, but you need it to get a solid clamp on the cable. It’s the big red tool above.
- 3/16″ Ferrules -(Aluminum is fine). You will want a smaller size if you are going to be using the tie-down for tiny dogs. In the orange packet.It is a two pack and you will use two on one tie-down.
- Vinyl-Coated Wire Rope– Don’t get 3/16″! I believe I got 1/8″ but don’t quote me. With the coating, it won’t fit in the ferrules. I got the next size down but check to make sure it fits in the ferrules before you cut it to the length you want. I reccommend making several tie-downs of different lengths. I have a 3′,4′, and a 5′ tie-down. We use the 4′ and 5′ sections the most frequently, the 3′ is quite restrictive (but sometimes useful in small spaces). If you are just going to make one length, I’d probably recommend doing a 4.5′ cable, because the 5′ is just a little too long–although it does depend on how big the space where they will be tethered is.
- Steel Swivel Eye Bolt-Type Snap Hooks-Two of them! LOOK at the weight the clip can handle and make sure it can handle your dog and then some. You don’t want the hook to be the weak point of your tie-down. To be honest, I wouldn’t use the clips shown (in the yellow container) because they have a lot of movement to the snap. I like them to be very sturdy, so after I noticed the clips I didn’t make any more with that kind.

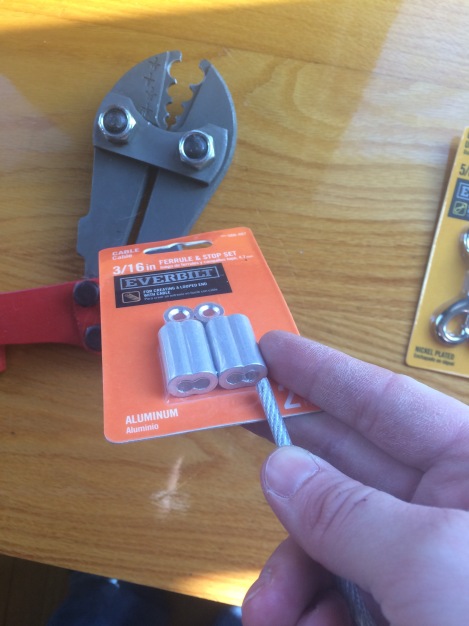
Below is a close up of the swaging tool. For dogs over 30lbs, I would rec’d using the 3/16″ setting. Whichever hole you use, make sure to get the ferrules (orange packet) in the corresponding size.

Don’t get a coated cable/wire rope the same diameter! That is the measurement on the outside of the metal ferrule. For the 3/16″ ferrule, you need a cable that is about 1/8″ in circumference. I rec’d poking a hole in the ferrule packet and checking that the cable fits before having them cut it (after they cut it, you have to buy it).
How to make the tie-down dog cable:
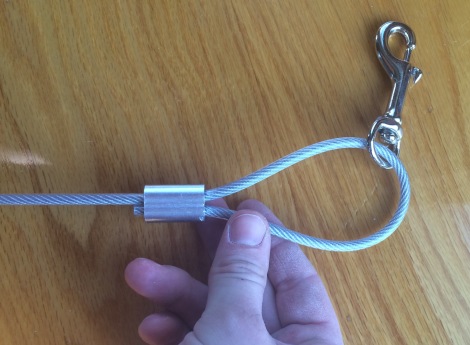
- Put the cable through the ferrule. Place the hook on afterward.
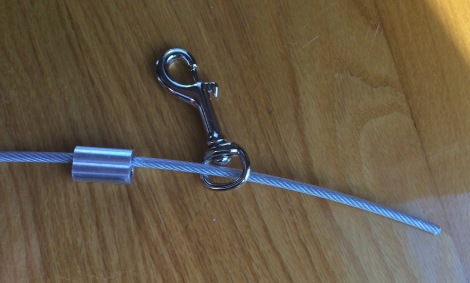
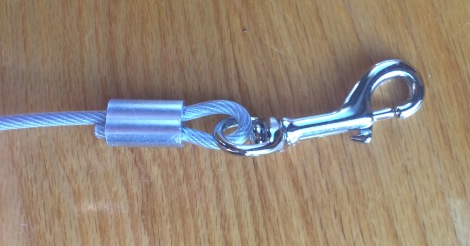
2. Make sure the cable is long enough so that you can easily thread the loose end into the other side of the ferrule. Only allow a small amount of the coated cable end to stick out.
3. Pull extremely had on the long part of the cable while holding the ferrule in place. Make sure the other end of the cable doesn’t shorten and is still sticking outside of the ferrule.
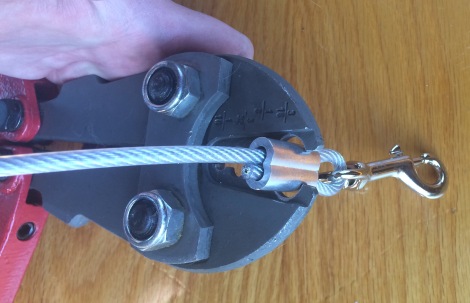
4. Finagle the swagging tool around so that you can fit the ferrule inside as shown. You will be compacting the ferrule twice around the wire to make a very secure connection. Start with the swagging tool closest to the swivel clip about 1/3rd of the way down the ferrule. Often it is easier to get the swagging tool on if you slip the cable into the hole and then pull the ferrule into the swagging tool (instead of trying to immediately get the swagging tool around the ferrule–that’s a fight and a half).
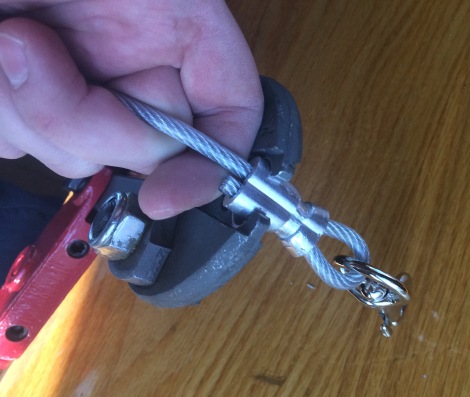
5. Close the swagging tool on the ferrule and completely clamp it shut. If you are an ox and have a ton of upper body strength, you may be able to do this on your own. I can’t, so I use a sturdy surface as leverage and then push down on the end of the swagging tool with my body weight to get it to crimp the metal.
6. Slide the swagging tool down so that it is creating another third. Leverage yourself and close the swagging tool again. Then move the cable about until you can release it from the swagging tool.
7.Repeat on the other side and you’re finished! Clip it to a screw eye that has been installed into a wall support about 1′ off of the ground. Clip your dog to the other side. Supervise! We recommend supervising whenever your dog is hooked to a tie-down to make sure they don’t get tangled and hurt themselves. Make sure there is nothing they could jump onto or over and accidentally choke themselves.

Pingback: Top 12 How To Shorten Dog Tie Out - Thư Viện Hỏi Đáp·